Deploy an ERC-20
Steps to deploy an ERC-20 token on the Ubiq network.
This guide can be used to deploy your own ERC20 token on the Ubiq network by following step-by-step instructions. Please note that while this guide is written for ERC20 tokens, any of the token standards can be deployed on the Ubiq network.
This guide is based on the blog post here.
Environment Prerequisites
Installing NodeJS
Installing NodeJS version Node.js v14.x
On macOS
The package installer for macOS can be found here.
On Debian / Ubuntu
Input the install commands by following the instructions for version Node.js v14.x found here.
Installing Truffle
With NodeJS version 14.x installed, use the following command to install Truffle.
npm install -g truffle
If you receive a permissions error, use:
sudo npm install -g truffle
Create a directory for your token code
Create a directory to work from in an easy-to-find location.
As an example, start in a high level directory like;
Debian / Ubuntu
cd /home/yourusername
And make a directory for your ERC20:
mkdir thenameofyourtoken
and switch to that directory:
cd thenameofyourtoken
macOS
cd /Users/home
And make a directory for your ERC20:
mkdir thenameofyourtoken
and switch to that directory:
cd thenameofyourtoken
Using Trufflebox to install Modules, Contracts & Libraries
Install Truffle's standard tutorial token library to acquire the needed pieces to compile your project.
Working within your project's new directory thenameofyourtoken run the command;
truffle unbox tutorialtoken
Configure truffle
This step is optional but highly recommended, it will significantly reduce the size of the bytecode produced when compiling the token later in the guide.
Open truffle.js and add the following options.
Install OpenZeppelin
We will be using standard token code provided by OpenZeppelin, install in your local working directory using npm.
Fusion
Install Fusion if you don’t already have it, you can grab the latest version from the GitHub releases page here. Get it syncing, it may take up to an hour to do the initial sync depending on connections and hardware. You will also need a small amount of UBQ to deploy the token, 1 UBQ is more than enough.
The token
Now everything is ready to go it’s time to work on the actual token. In the contracts/ directory (created by the unpacked Truffle Box) create a new file Blemflarck.sol and start by adding the follow solidity code.
We import ERC20PresetMinterPauser.sol from OpenZeppelin.
We declare the contract Blemflarck as a ERC20PresetMinterPauser, inheriting all variables and functions from the ERC20PresetMinterPauser.sol imported above.
Next we need to set parameters specific to our token; name, symbol, decimals and initial supply. Add the following to the contract object.
The name and symbol variables should be self explanatory, these are the equivalent of Ubiq (name) and UBQ (symbol).
The decimals variable determines how many decimals places the token has, in this case I have gone with 2 to keep thing familiar (cents)
The initial supply defines the number of tokens created when the contract is deployed, this needs to be defined in the smallest unit, in this case cents (1 token = 100 cents). We will create 10,008 tokens when deploying the token.
We are now done with the code. You should have something that looks like this.
Compiling the token
Modify contracts/Migrations.sol so that it can compile with the newer version of Solidity. Replace the first line with:
We will be using truffle to compile to utilize the solc optimizations we configured earlier. As everything is already set up, we can simply run

Deploy with Fusion
Open build/contracts/Blemflarck.json and scroll down to the bytecode key and copy its value (without the quotes)

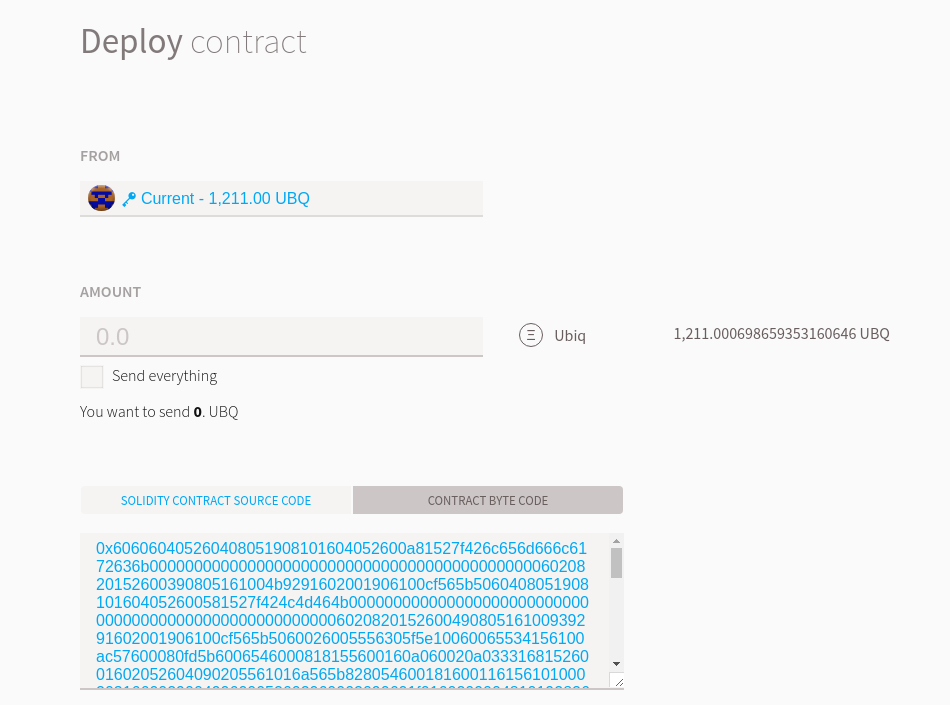
In fusion go to the contracts view, click the deploy new contract button, select the address you wish to use to deploy, this address will pay the gas for the deploy transaction and receive the initial token supply. Leave the amount field empty.
By default the solidity contract source code tab is active, as we have already compiled the byte code, select contract byte code and paste the tokens byte code (copied above) into the contract code field.

You can leave the fee as default (cheaper) and click deploy. You will be prompted to enter the passphrase for the address you are deploying from, do this then send transaction. Now you just need to wait until the transaction is included in a valid block, and we can continue to the final step.

Adding your token to Fusion
Once confirmed you will be able to see the tokens contract address

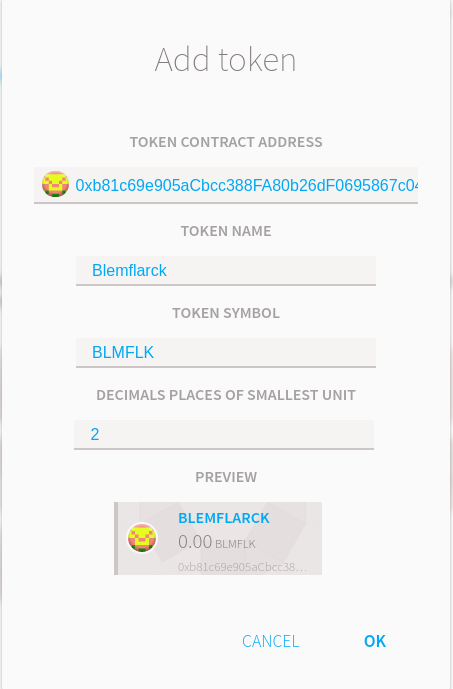
Copy the contract address. Now head back to the contracts view, scroll to the bottom and click watch token. Paste the token contract address into the first field, the remaining fields will auto complete. Click OK.

You will now see your token listed in custom tokens on the contracts view. If you select your address on the wallet view, you will also see you have a balance of 10,008 Blemflarck.
As of April 1st 2017, the Blemflarck, also known as galactic credits, has a value of 0 of itself (thanks Rick)
We are now done creating your first ERC20 token on Ubiq. It only has basic functionality (transfer, transferFrom, approve, decrease approval, increase approval), in the next guide we will create tokens with additional functionality (burn, mint, timelock), keep your project directory as we will need that later.
Last updated
Was this helpful?